
Accurate measurements are the foundation of successful custom window replacements. Whether you’re upgrading to energy-efficient windows to qualify for Ontario rebates or simply modernizing your home, proper measuring techniques ensure your new windows fit perfectly. This comprehensive guide walks you through the process of measuring for custom window replacements, helping you avoid costly mistakes and ensuring a smooth installation process.
Why Accurate Window Measurements Matter
Precise measurements are critical when ordering custom replacement windows. Even small errors can lead to significant problems during installation, potentially resulting in air leaks, water infiltration, and reduced energy efficiency. In fact, improperly sized windows can account for up to 30% of a home’s heating and cooling energy loss.
Taking the time to measure correctly not only ensures a proper fit but also maximizes the performance benefits of your new windows, including improved insulation, noise reduction, and enhanced curb appeal.
The Cost of Measurement Errors
Measurement mistakes can be expensive. If your custom windows arrive too small, you’ll face gaps that require additional framing, insulation, and finishing work. Windows that are too large may not fit at all, requiring a complete reorder and significant project delays.
Professional window installers report that measurement errors are among the most common reasons for project complications, often adding 10-15% to the total replacement cost and extending timelines by weeks.
DIY vs. Professional Measurements
While many homeowners can successfully measure for replacement windows, the stakes are high. Professional window companies typically offer measurement services, often at no cost when you purchase windows through them. This service includes a thorough assessment of your existing window openings and expert recommendations for the best replacement options.
If you’re applying for energy efficiency rebates through programs like Canada’s Greener Homes Grant, professional measurements may be required to ensure your new windows meet program specifications.
Essential Tools for Measuring Windows
Before beginning the measurement process, gather the right tools to ensure accuracy. Having proper equipment on hand makes the job easier and helps prevent errors that could affect your window order.
Most window measurements can be completed with common household tools, though investing in quality measuring equipment is worthwhile for this important task.
Required Measuring Tools
To accurately measure for replacement windows, you’ll need:
- Steel measuring tape (at least 25 feet long)
- Digital laser measure (optional but helpful for hard-to-reach areas)
- Carpenter’s level
- Carpenter’s square
- Notepad and pencil
- Smartphone or camera to document existing windows
- Flashlight for examining window frames
Optional but Helpful Equipment
For more complex window configurations or to ensure maximum accuracy, consider these additional tools:
- Depth gauge for measuring frame thickness
- Angle finder for bay or bow windows
- Moisture meter to check for hidden damage
- Step ladder for accessing tall windows safely
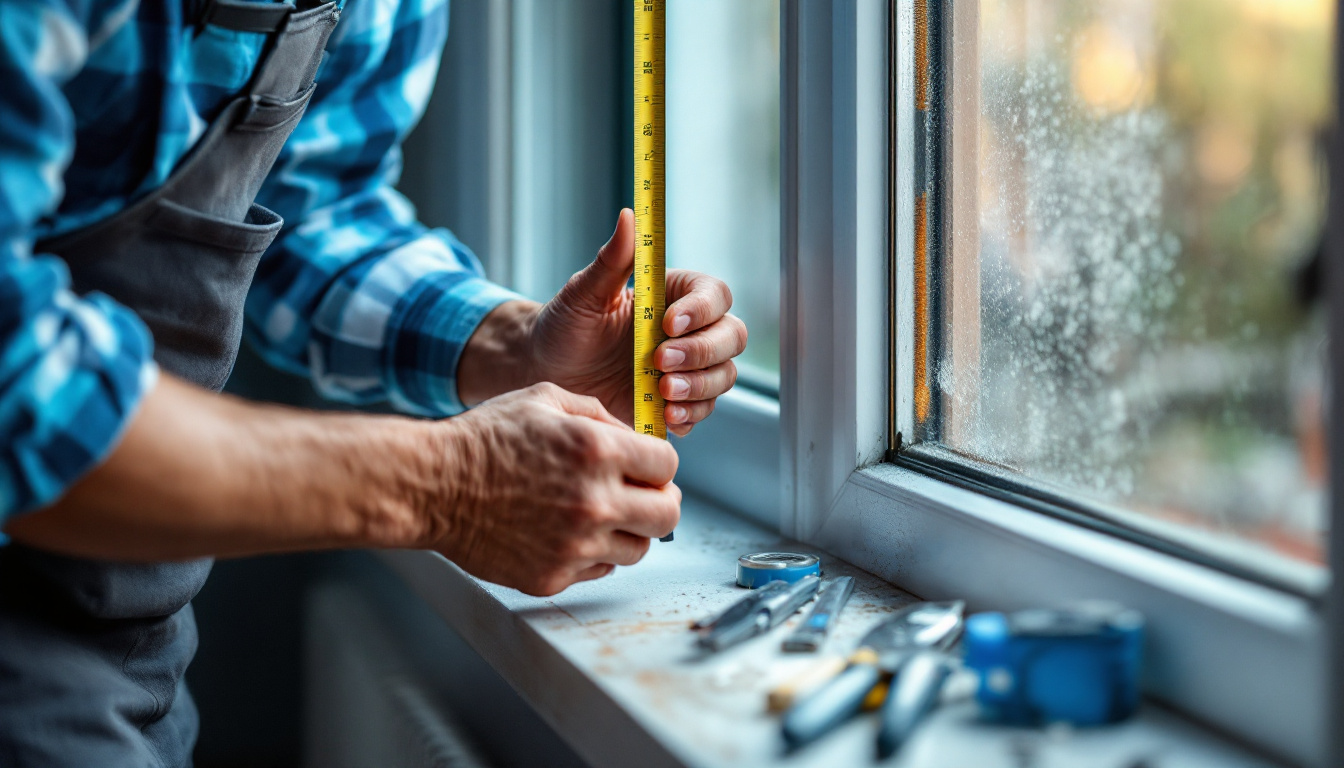
Step-by-Step Window Measurement Process
Following a systematic approach to window measurement helps ensure accuracy and consistency. The process involves measuring width, height, and depth at multiple points for each window opening. Remember that replacement windows are typically custom-manufactured based on your measurements, so precision is essential.
For best results, measure each window individually, even if they appear identical. Homes settle over time, and openings that look the same may have subtle differences that affect fit.
Measuring Window Width
To determine the correct width for your replacement window:
- Measure the width of the window opening from jamb to jamb (not the trim) at three points: top, middle, and bottom.
- Record all three measurements to the nearest 1/8 inch.
- Use the smallest of the three measurements as your width dimension.
- For pocket replacements (where you keep the existing frame), subtract 1/4 inch from this measurement to allow for proper installation.
Width measurements are particularly important for ensuring your window operates correctly. Too tight, and the window may bind; too loose, and you’ll have gaps that reduce energy efficiency.
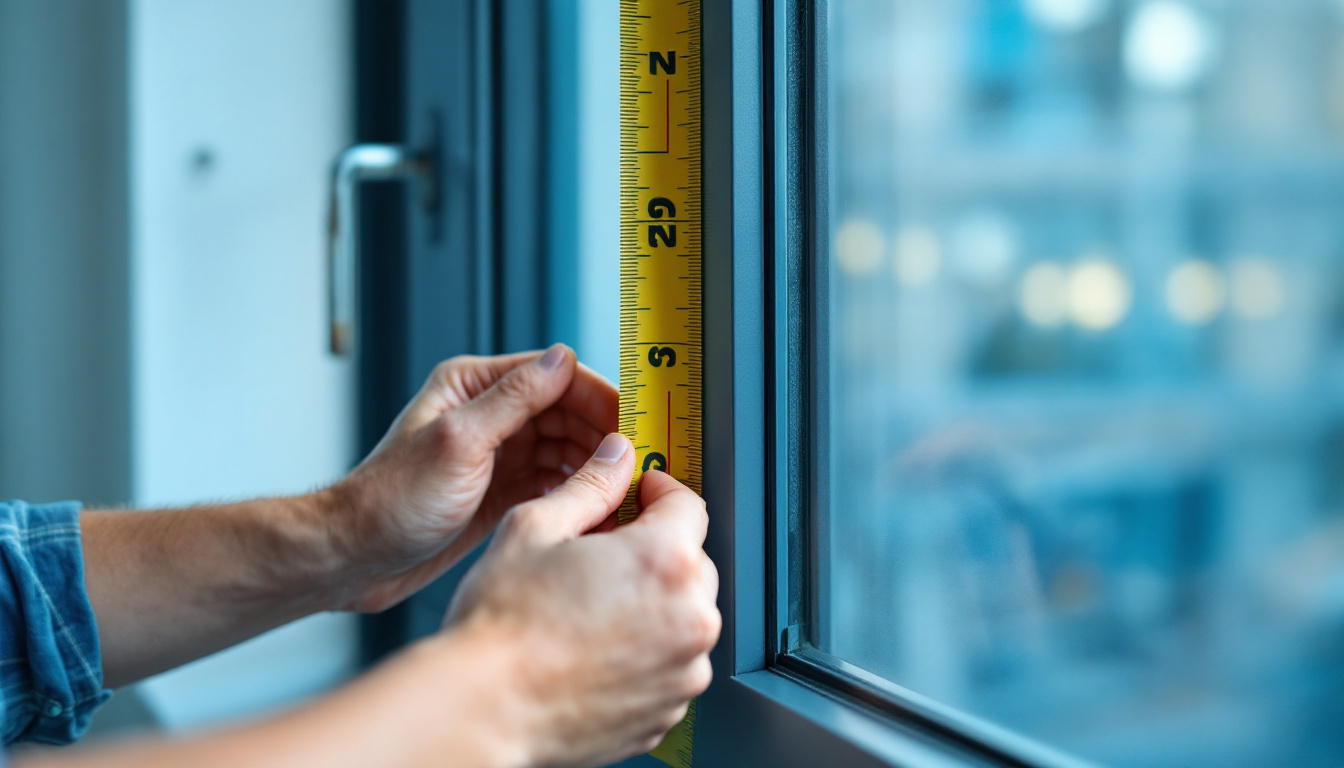
Measuring Window Height
For accurate height measurements:
- Measure from the high point of the sill to the top of the window opening at three locations: left side, center, and right side.
- Record all three measurements to the nearest 1/8 inch.
- Use the smallest of the three measurements as your height dimension.
- For pocket replacements, subtract 1/4 inch from this measurement to ensure proper fit.
Height measurements are critical for proper window operation and water drainage. Incorrect height can lead to operational issues and potential water infiltration during heavy rain.
Measuring Window Depth
Window depth is often overlooked but is crucial for proper installation:
- Measure the depth of the window jamb from the inside edge to the outside edge.
- Ensure there’s at least 3 1/4 inches of depth for standard replacement windows.
- If your depth is less than 3 1/4 inches, consult with a window professional about alternative options.
Insufficient depth can limit your window style options or require modifications to your wall structure, potentially increasing the project cost.
Checking for Square
Windows that are out of square require special attention:
- Measure diagonally from the top left corner to the bottom right corner.
- Measure diagonally from the top right corner to the bottom left corner.
- Compare the two measurements – they should be within 1/4 inch of each other.
- If the difference exceeds 1/4 inch, note this for your window provider, as special accommodations may be needed.
Out-of-square openings are common in older homes and may require custom solutions or adjustments during installation to ensure proper fit and function.
Special Considerations for Different Window Types
Different window styles have unique measurement requirements. Understanding these differences helps ensure you order the correct replacement windows for your specific needs. Window manufacturers typically have detailed specifications for each window type they offer.
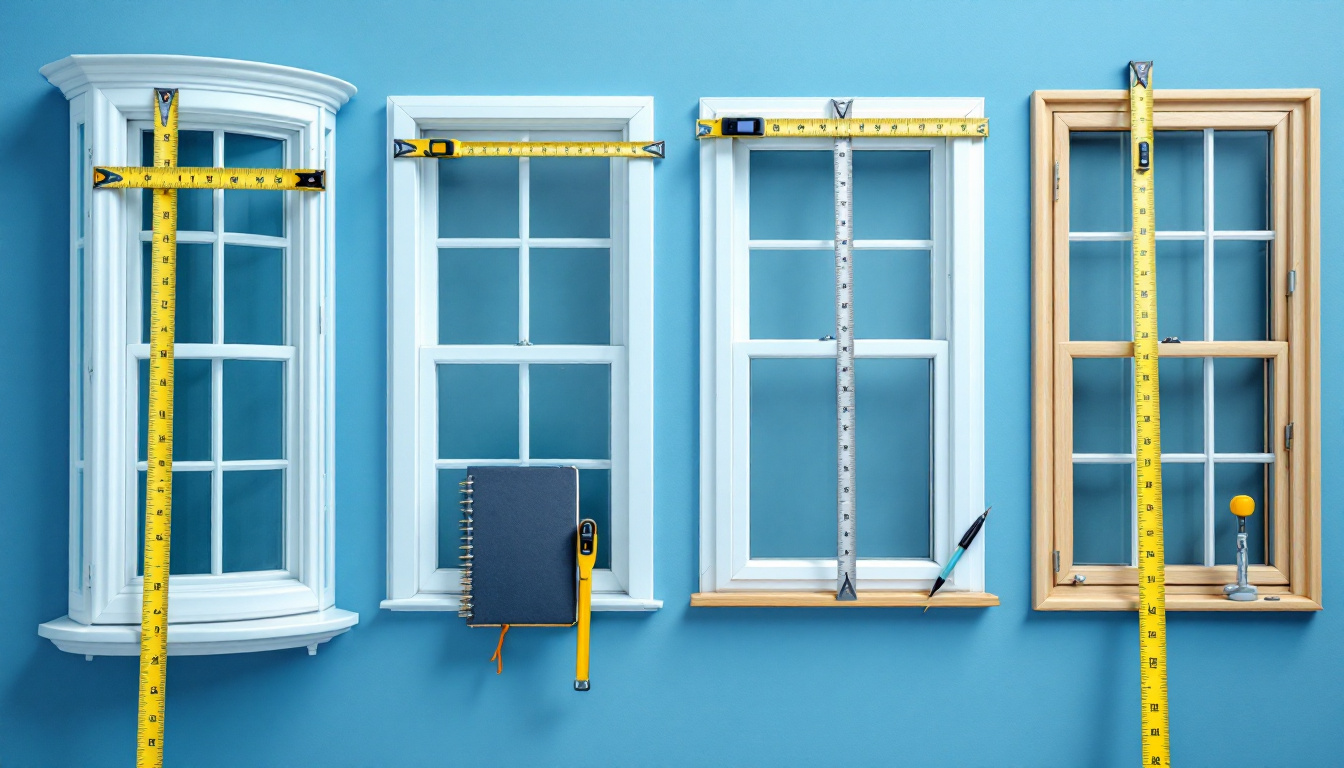
Always consult the manufacturer’s guidelines for the specific window style you’re considering, as requirements may vary between brands and models.
Bay and Bow Windows
These projecting window types require additional measurements:
- Measure the width and height of each individual window section.
- Determine the projection distance (how far the window extends from the house).
- Measure the angles between window sections (typically 30° or 45° for bay windows).
- Check for adequate support beneath the window, as these heavier units may require additional structural reinforcement.
Bay and bow windows are complex installations that often benefit from professional measurement services to ensure proper fit and structural integrity.
Casement and Awning Windows
For these hinged windows, pay special attention to:
- Clearance requirements for the window to open fully without obstruction.
- Direction of hinge placement (left or right for casements).
- Operator mechanism location and type.
- Egress requirements if the window serves as an emergency exit.
Casement windows offer excellent ventilation and energy efficiency but require proper measurement to ensure smooth operation and maximum performance.
Sliding and Double-Hung Windows
For windows with sliding sashes, consider:
- Track depth and condition in existing frames.
- Balance system type for double-hung windows.
- Configuration of operable vs. fixed sashes.
- Tilt-in cleaning features that may require additional clearance.
These popular window styles offer versatility and ease of use but depend on precise measurements for smooth operation and energy efficiency.
Recording and Organizing Your Measurements
Proper documentation of your window measurements is essential for ordering accurate replacements. Creating a systematic record helps prevent confusion and ensures each window is correctly matched to its intended opening.
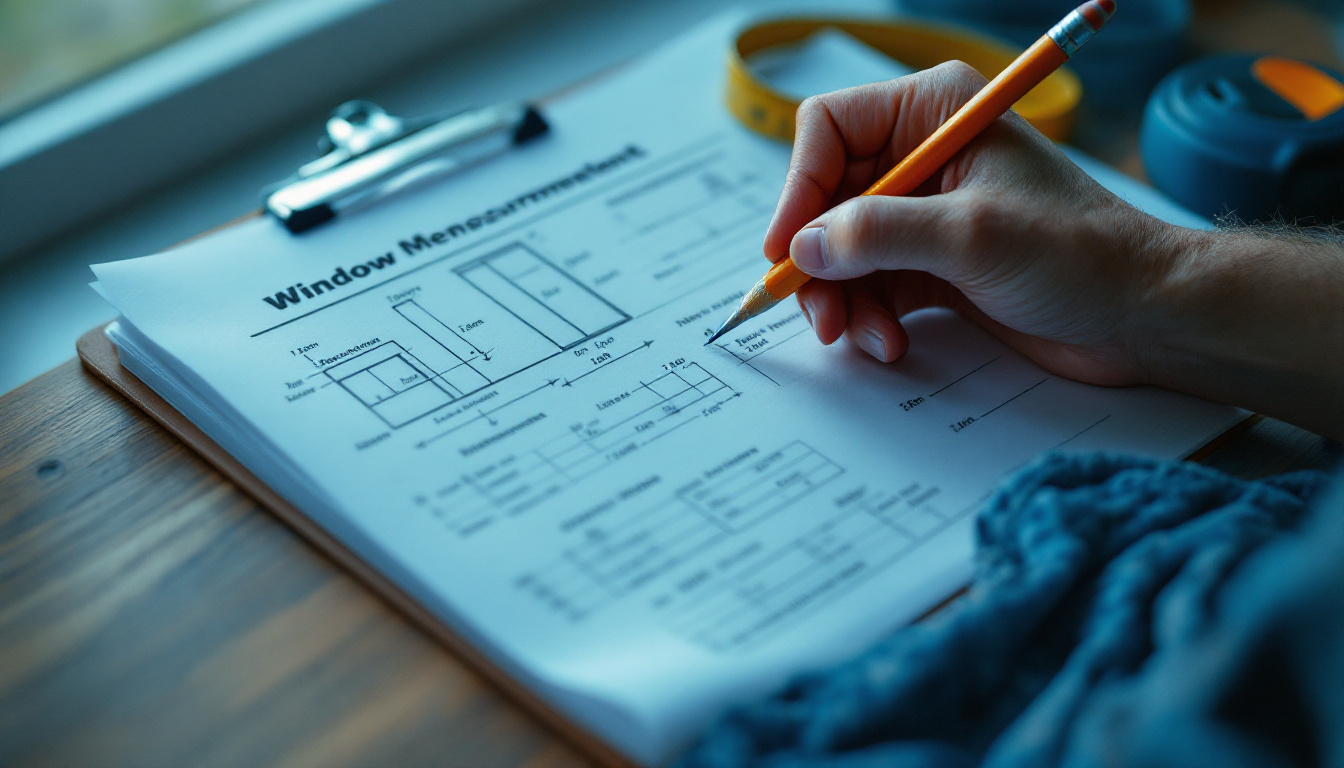
Most window manufacturers and installers have specific forms or templates for recording measurements, which help ensure all necessary information is captured.
Creating a Window Schedule
A window schedule is a comprehensive document that includes:
- Unique identifier for each window (e.g., W1, W2, etc.)
- Location in the home (e.g., master bedroom north wall)
- Window type and operation style
- Width, height, and depth measurements
- Special features or requirements (e.g., tempered glass, specific grid patterns)
- Notes about existing conditions or installation challenges
This detailed schedule becomes an invaluable reference during the ordering process and helps ensure each window is installed in its intended location.
Using Technology to Document Windows
Modern technology offers helpful tools for window documentation:
- Smartphone apps specifically designed for window measurements
- Digital photos of each window with measurement overlays
- 3D scanning technology for complex window configurations
- Cloud storage for sharing measurements with contractors and manufacturers
These technological solutions can improve accuracy and communication throughout the window replacement process, reducing the risk of errors and misunderstandings.
Common Measurement Mistakes to Avoid
Even experienced DIYers can make measurement errors that lead to problems with window replacements. Being aware of common pitfalls helps you avoid costly mistakes and ensures your project proceeds smoothly.
Taking the time to double-check your measurements and understanding these common errors can save significant time and money during your window replacement project.
Measurement Accuracy Issues
Watch out for these common measurement errors:
- Measuring to the trim instead of the jamb
- Using worn or inaccurate measuring tapes
- Failing to measure at multiple points
- Rounding measurements instead of using exact fractions
- Transposing width and height dimensions
- Not accounting for the window sill when measuring height
These seemingly small errors can result in windows that don’t fit properly, compromising both appearance and performance.
When to Seek Professional Help
Consider professional measurement assistance if:
- Your home has settled significantly, creating irregular openings
- You’re dealing with historic windows or unusual configurations
- Structural issues are present around window openings
- You’re applying for energy efficiency rebates with specific requirements
- You’re uncomfortable with the responsibility of precise measurements
Professional window companies have extensive experience measuring for all types of replacement situations and can identify potential issues that might not be apparent to homeowners.
With accurate measurements in hand, you’re ready to explore the many energy-efficient window options available, potentially qualifying for significant rebates through programs like Ontario’s Home Renovation Savings Program while enhancing your home’s comfort and appearance.